Saturday, June 28, 2014

Ajax and Riptide

Wow! This week has been crazy! I started interning with the curator of the Historical Society of Dauphin county on Thursday and also finished Ajax. I started Riptide today.

My ref picture

Riptide in his first layer of color
Here's a quick picture of Ajax - I'll post final pictures of him when I'm finished with Riptide.


Monday, June 23, 2014

Some Still Life

Yesterday I had the wonderful opportunity to go to a portfolio workshop at Moore College of Art and Design. We worked on some still life drawings - here are a couple of my favorites from the day (sorry about the cell phone pics - my scanner isn't big enough to scan these). 


Thursday, June 19, 2014

How I do White Markings

The video is finally done! Please excuse my voice - allergies are really annoying this year. So without further adieu...How I do White Markings

I hope this helps!

Wednesday, June 18, 2014

Swimmy Meets the Guillotine

I've decided that Swimmy needs a new neck to make him look like he is under water so yesterday he met the guillotine (aka a saw).
He is also missing his hind end in preparation of getting a tail. Stay tuned!   

Monday, June 16, 2014

Another Coat of White and More!

Ajax has another coat of white sealed in - I think my next step is to go in with some paint and thin some of the markings down. Then its on to detailing! My next project on this end is a Stablemate version of Surfer Dude's Riptide.

My seahorse that will now be dubbed "Swimmy" has had added movement to make him look - well - more swimmy. The next step is to cut off his butt and start forming his tail. Also I need to stick a dowel in him to connect to a base.  
"just keep swimming, just keep swimming"

Sunday, June 15, 2014

Under the Sea

Hey all! So Ajax is in his first layer of paint and I think will possibly need about 2 to 3 more layers before his white markings are started. You'll be able to see more pictures of him down post.
So as many of you who know me already know when summer comes around my head is at the beach. So to combine my love of horses, the beach, and mythology I'm starting a hippocampus aka a seahorse aka merhorse. I've made one before which can be seen here


my body
I'm going to base the body details off of a lion fish, though I don't know what color I'm going to do him in yet.
lion fish

On to Ajax - he's so close to being ready for details! My white marking video is also almost finished so stay tuned for that.


Friday, June 13, 2014

It Has Begun!

....White markings that is! The first layer is sealed in. Right now I'm waiting for it to cure a bit before I start the second layer, though it may not be sprayed in anytime today due to the rain and humidity. My video is also in progress. 

I probably won't post tomorrow because I have the ACTs. So happy weekend people!

Thursday, June 12, 2014

Time for White Markings

Sorry I didn't update ya'll yesterday. I had a nice solid layer of pigments on Ajax and went outside to spray...but I didn't realize it was raining..anyways today I was able to finish the black points of the horse today! Yay! 
I've been experimenting with the use of wet pigment for black points and while it still needs a bit of refining, I like the results so far!

first layer of wet black pigments on the legs
three more layer sealed in along with muzzle, eyes, and genital shading
Stay tuned for that white markings video! I'll start making it when the sealer cures. It's not a new technique but I've always found it helps to see how others do the same technique.
In other news my mom and I booked a room in Chincoteague Saturday-Thursday of Pony Penning so I'll be coming to see the Feather Fund auction!

and a cute picture of Spring hugging a stuffed dog


Tuesday, June 10, 2014

The Dragon Garden

Nothing new on the horse front today, its a bit to humid for sealing. But I recently have gotten into the trend of fairy gardens. Instead of fairies though, I made a dragon garden. I made the cave and gold pieces out of polymer clay. I scattered around a few crystals too. I've had the dragon figurine for a while and have finally been able to put it to use.


Make sure to stay tuned for a video on how I paint my whites and detail my horses!

Monday, June 9, 2014

Tools of my Trade

So for today's post I decided to show you the tools I use and some of the processes I use.

The above pictures show some of the tools I use when achieving color on a horse. After prepping a horse I prime it with Krylon ColorMaster Primer. After that cures I "sock" it which is basically rubbing the horse with a sock to cut down on flaws. 
A nicely primed model
soon to be portrait of Chicoteague pony stallion Riptide
Then I begin applying layers of color using pastels and earth pigments and sealing them in with Krylon Matte Sealer. As with watercolor you start with the lightest color and build up to the darkest. I prefer to use earth pigments because it takes less time to achieve the color I want.

Portrait model of Ajax, almost ready for shading
After I finish the base color I begin shading with a slightly darker pigment. It depends on my reference picture on how dark I shade.

Stay tuned for a video on how I create my white markings and do my detailing!

Sunday, June 8, 2014

I was Finally Able to Go on That Primer Run

So I finally was able to go for a primer and sealer run meaning....

I can start working on my resin....


Ajax can be continued without delay....


and this guy can finally get some color on him!


Saturday, June 7, 2014

The Feather Fund's Model Horse Auction

So last year myself and Kristian of Five Paws Studio found an amazing organization called the Feather Fund. They help deserving children buy the pony of their dreams at the Pony Penning in Chincoteague. Every year they hold an auction which the main highlight is model horse portraits of the various horses on Assateague.
More on their story here.
Check out their Facebook here.
This year I'm hoping to send two donations. I've started on one's color and the other is waiting for me to do a primer run before I can get some color on him.

The model I've started will be painted as a portrait of Ajax a bay pinto stallion.
photo courtesy of Lois Szymanski
In the first layer of pigments
The other I hope to paint a light buckskin pinto. More updates will come on him later. So, all my model horse friends check out this organization and if possible consider donating something to this auction so the Feather Fund can raise some funds to continue their wonderful mission!

Friday, June 6, 2014

Some of My Flat Art

I just got back from a wonderful visit at Kutztown University. It's a wonderful school and it has an awesome art education program. So without further adieu...some of the work in my portfolio!


I have been on an owl kick lately. Right now I'm focusing on observational drawing so that may pop up at some point.

Thursday, June 5, 2014

Now on Etsy!

Breyer Stablemate Thoroughbred customized to Blood Bay.


Creating a Cool Black Horse with Pastels and Pigments part one

What You'll Need:
  • blue, purple, and green pastels/pigments
  • something to hold the powder
  • an applicator (it can be a brush, q-tips, ect.)
  • a reference picture
  • a sock
  • a fully prepped horse
  • sealer
  • x-acto knife
**When using an x-acto knife or any other type of sharp object please have parental supervision**

The first step to any project is to find a good reference picture. You can use search engines, horse books, magazines, ect. Anything with horse pictures is a great tool to the customizer. This is the picture I am using.
Photo supplied by Stonecreek Farm Fell Ponies, USA ©
Next you'll want to buff your prepped model with a sock. Buffing is the process of rubbing a horse until it is shiny to reduce any chance of grain. Its the same as using a high grit sandpaper but you are not running the risk of removing paint.
Nice and shiny!
Find a container to put the pastels you are about to shave. I use the plastic holders from a K-cup. Next begin shaving the various colors you've chosen, I use an x-acto knife. But wait! You said that this was a tutorial for a black horse!
Yes it is but these colors will help you create a horse that has dimension instead of one that is flat black.  
Colors I used

Mixture color
What you'll want to do next is to apply your mixture to the horse. If you use pastels it will take longer to achieve the color you'd want.
First layer in
Keep on going until the color is solid or close to it. The next installment will cover coloring it black and the detailing.

Wednesday, June 4, 2014

Summer has Begun! (I'm a Senior now)

So today my school had our class ring ceremony. You know what that means? I'm officially a senior now! We also had our award ceremony where I won a High Achievement award in Art, Spanish, and English. My ring has a couple of paint brushes on it and my graduation year. It also has my birthstone which is diamond (cough cubic zirconium cough).
My ring
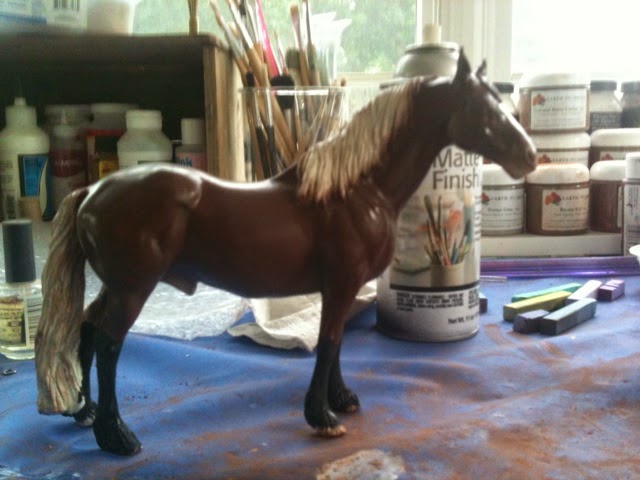
So not only am I out of school for the summer but I get home and this girl is waiting for me! There is hardly any seams and she's gorgeous!

Draft Mare by Deborah McDermott
My sales piece is in the process of being detailed and is almost ready to be posted to Etsy.


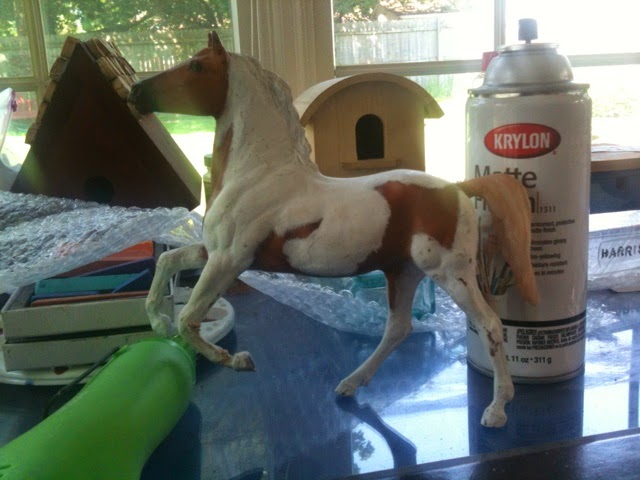
I found a custom that I put away last summer because it was being frustrating and was able to fix it, so look! Another sales piece.

He's actually a very red bay, its just that my phone camera is somewhat crappy

Annnnd I prepped another little guy for paint.


Tuesday, June 3, 2014

Productivity Boost

So today I seemed to have taken a productivity pill or something. I have another layer of white sealed in on my first sales piece. I found another TB stablemate that needed a little foot TLC. I was also able to finish prepping a pony that's been sitting around for a while.
 
Group shot!
I was also able to put a little more meat on my Chincoteague pony's butt. He's next for the primer bench!


Monday, June 2, 2014

Sales Piece Update

Gasp, what is this sorcery? Two posts in one day! So I've been busy today working on the whites on my sales piece. I tried out the technique of using a prismacolor to draw and color in the markings for the first couple of layers. So far I like it! Its faster and produces smoother results.
I started out with a really crazy pinto pattern which can be found in the first picture. I started to fill it in because I didn't like the way it looked. The final pattern can be seen in the third picture. He just needs a couple more layers and then I can start in on the detailing!
 
first layer of paint

beginning the second layer

second layer finished and sealed in