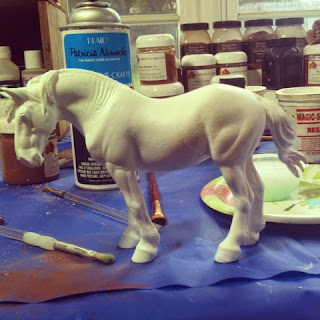
Showing posts with label Pigments and Pastels. Show all posts

Saturday, October 4, 2014

Creating a Flaxen Liver Chestnut - Part Three

Here's what you need:


  • brushes or q-tips for applying color
  • horse
  • reference picture
  • matte acrylic sealer
  • Brown 610 or a reddish brown pastel
  • Chocolate brown pigment or pastel 
  • Dark chocolate brown pigment or pastel
  • Black pigment or pastel
To shade the horse, I created a mix of the chocolate brown pigment, dark chocolate brown pigment (pictured below), and black pigment. This crests a dark brown, almost black mixture.

Final picture
Next, apply three to four layers of the pigment mixture.


After the dealer has cured, apply brown 610 around the outer edges of the shading. Apply and blend the darker mixture and seal the layer. This creates softer line of delineation between the shading and base color. 


After that has cured, alternate between black and white pigment on the muzzle, the eyes, and the genital area. The method I use for creating a flaxen mane and tail is depicted in these two videos by K Smith Equine Creation -

If y'all have any requests just post them in the comments!

Saturday, September 27, 2014

Creating a Flaxen Liver Chestnut - Part Two


Here's what you need:

  • brushes or q-tips for applying color
  • horse
  • reference picture
  • matte acrylic sealer
  • Brown 610 or a reddish brown pastel
  • Chocolate brown pigment or pastel 
Today we'll cover finishing the base coat and the very beginning of the shading. As always make sure to have a reference picture close by!


In part one, I pasteled three layers of pigments onto my drafter. The horse is pictured in its fourth layer. I uses a wet pigment technique that I am still developing to get the Brown 610 solid.


When the sealer dried I pasteled another layer of Brown 610 and then blended my chocolate brown pigment across the top line. With that, my base coat was finished and the shading had begun!


In the next installment, I'll continue the shading. 

Monday, September 1, 2014

Creating a Flaxen Liver Chestnut in Pigments and Pastels - Part One

Here's the liver chestnut tutorial I promised!

Here's what you need for this part:

  • brushes or q-tips for applying color
  • prepped horse
  • reference picture
  • Brown 610 or a reddish brown pastel
  • acrylic sealer 

First, find a reference picture for your project. You can use one ref picture for your model or two - one for the color and one for the markings.
photo from http://www.proudmeadows.com/breeding_rondo.asp
After that, make sure your model is completely prepped. For this tutorial I'm using Pretty Girl (name pending). You can buff it if you want, but it is not required as this is going to be a dark color and you'll be able workout any grain issues in the layers.


Start with a coat of Brown 610 or an equivalently colored pastel. Seal in three layers. 

First layer unsealed

First layer sealed

Second layer sealed

Third layer sealed
In the next post I'll cover darkening her up.


Sunday, August 31, 2014

Creating a Sorrel in Pigments and Pastels - Part One


Today, I'll show you the first couple of steps to creating a copper chestnut or sorrel horse. For the the purpose of this tutorial I will refer to this color as sorrel, because I will also be doing a flaxen liver chestnut tutorial (hopefully) simultaneous to this one.

As defined by Wikipedia "Sorrel is an alternative word for one of the most common equine coat colors in horses. While the term is usually used to refer to a copper-red shade of chestnut, in some places it is used generically in place of "chestnut" to refer to any reddish horse with a same-color or lighter mane and tail, ranging from reddish-gold to a deep burgundy or chocolate shade. The term probably comes from the color of the flower spike of the sorrel herb."

On to the actual making of the color! First, as with any other horse color, find a reference picture! Since the horse I'm using is a commission - here is the picture I was given to use -

photo provided by Ashley Johnson
First I break out on of my rarely used colors (mostly because I've been addicted to bays and blacks...shhhh). Havana Ocher is a nice orangeish brown color that goes on with a medium stain. 


I paint the color on for two layers. It went on fairly dark for the first layer, and for the second layer it only caused minimum color change.

first layer

second layer
In the next installment I'll darken this guy up a bit then work to redden his coat, if all goes well. Also keep your eye out for my liver chestnut tutorial which should be up soon!

Monday, August 11, 2014

Poco's Starry Night - Part Two

This girl is almost finished. I just need to touch up some of the white markings and hooves.

white markings started
facial marking
almost completed
the other side


Monday, August 4, 2014

Poco's Starry Night - Part One


Poco's Starry Night is a beautiful black pinto pony. This guy is a commission for someone I met in Chincoteague. 

resculpting his tail
adding a longer mane
completely prepped
First layer of color for his journey to sunburnt black 


Monday, June 9, 2014

Tools of my Trade

So for today's post I decided to show you the tools I use and some of the processes I use.

The above pictures show some of the tools I use when achieving color on a horse. After prepping a horse I prime it with Krylon ColorMaster Primer. After that cures I "sock" it which is basically rubbing the horse with a sock to cut down on flaws. 
A nicely primed model
soon to be portrait of Chicoteague pony stallion Riptide
Then I begin applying layers of color using pastels and earth pigments and sealing them in with Krylon Matte Sealer. As with watercolor you start with the lightest color and build up to the darkest. I prefer to use earth pigments because it takes less time to achieve the color I want.

Portrait model of Ajax, almost ready for shading
After I finish the base color I begin shading with a slightly darker pigment. It depends on my reference picture on how dark I shade.

Stay tuned for a video on how I create my white markings and do my detailing!

Saturday, June 7, 2014

The Feather Fund's Model Horse Auction

So last year myself and Kristian of Five Paws Studio found an amazing organization called the Feather Fund. They help deserving children buy the pony of their dreams at the Pony Penning in Chincoteague. Every year they hold an auction which the main highlight is model horse portraits of the various horses on Assateague.
More on their story here.
Check out their Facebook here.
This year I'm hoping to send two donations. I've started on one's color and the other is waiting for me to do a primer run before I can get some color on him.

The model I've started will be painted as a portrait of Ajax a bay pinto stallion.
photo courtesy of Lois Szymanski
In the first layer of pigments
The other I hope to paint a light buckskin pinto. More updates will come on him later. So, all my model horse friends check out this organization and if possible consider donating something to this auction so the Feather Fund can raise some funds to continue their wonderful mission!

Thursday, June 5, 2014

Creating a Cool Black Horse with Pastels and Pigments part one

What You'll Need:
  • blue, purple, and green pastels/pigments
  • something to hold the powder
  • an applicator (it can be a brush, q-tips, ect.)
  • a reference picture
  • a sock
  • a fully prepped horse
  • sealer
  • x-acto knife
**When using an x-acto knife or any other type of sharp object please have parental supervision**

The first step to any project is to find a good reference picture. You can use search engines, horse books, magazines, ect. Anything with horse pictures is a great tool to the customizer. This is the picture I am using.
Photo supplied by Stonecreek Farm Fell Ponies, USA ©
Next you'll want to buff your prepped model with a sock. Buffing is the process of rubbing a horse until it is shiny to reduce any chance of grain. Its the same as using a high grit sandpaper but you are not running the risk of removing paint.
Nice and shiny!
Find a container to put the pastels you are about to shave. I use the plastic holders from a K-cup. Next begin shaving the various colors you've chosen, I use an x-acto knife. But wait! You said that this was a tutorial for a black horse!
Yes it is but these colors will help you create a horse that has dimension instead of one that is flat black.  
Colors I used

Mixture color
What you'll want to do next is to apply your mixture to the horse. If you use pastels it will take longer to achieve the color you'd want.
First layer in
Keep on going until the color is solid or close to it. The next installment will cover coloring it black and the detailing.

Sunday, June 1, 2014

A Few Updates


Hey all, I have a couple updates for ya! First up is my current in progress sales piece done in pigments. He's shaded very dark because he'll become a paint very soon. Keep an eye on my Etsy store (I run this store along with a friend) for him! 


Next up is a horse that I did in my art class at school. He is in the process of being prepped. Every time I think I'm done with him I find something else...as it is with all of my prepping jobs. This guy is meant to be a Chincoteague pony. He started out as the Classic Secretariat mold. 


So does anyone have any requests for how-tos? Just leave a comment to let me know.


Sunday, July 7, 2013

Grain, Grain, Go Away...

So if you have ever done a horse in pastels or pigments, unless you have been extremely lucky, you have had grain on your horse. Grain is usually caused by very small divots in your horse's primer or sealer. It can also be caused by going using a color a couple shades darker than the color you have already laid down or not allowing enough time for your sealer or primer to dry.

Grain from going to a shade of light yellow to a medium brown
One of the things you can do to counteract grain is to buff the horse with a clean (I can not emphasize how important the clean part is) white sock, this is often called socking. Once your primer is completely dry, I usually give it a day or if I'm impatient at least twelve hours, you rub your horse with the sock until it has a shine. This process is essentially the same as sanding with a high grit sand paper, without running the risk of sanding off primer. The sheen comes from knocking down the divots that create grain. 

The shine of a socked horse
Even with the sheen pastels or pigments should still stick to the horse. If they aren't, hit the horse with a coat of Krylon Matte Sealer (or something similar). Wait for the sealer to cure and buff, after buffing try applying the pastels or pigments again.

Another cause for grain is missing a part of your horse with the sealer. If you don't notice this and you lay down another layer of color, the parts that aren't sealed in will not get any darker. So my cure for that is looking your horse over after you seal it. If you see a lighter color then what you had just sealed in, hit that part of the horse with another layer of sealer.

My advice for you is if you are doing a lighter color, buff, buff, buff, and buff again! You should buff every time your layer of sealer cures. When you're doing a darker color you have a bit more leeway, but I still recommend buffing in between every layer.

If you have any questions, please ask! Also if you want to see any type of tutorials, just ask, I'm very easily swayed :-).

Monday, July 1, 2013

How I do a Bay in Pastels and Pigments Part 2


So in Part 1 I showed you how I do the base color and shading of a bay horse. In this segment I'll show you how I do the black points, grey points, and details.

Supplies Needed
  • black paint (craft or artist quality)
  • burnt sienna
  • burnt umber
  • black pigment or pastels
  • titanium white pigments or pastels


First comes the black points on the legs. This first step is optional. First you take black paint (I prefer artist quality because I can get better results. You can use a craft brand too - whichever you prefer.) Thin the paint down to a milky consistency. 


Next paint the pastern and fetlock the darkest thinning the paint until you can barely see it below the knee.


Let the paint dry thoroughly and seal it in. This step helps achieve the look of the darker fetlock and pastern. It also makes the black look more blended. You don't have to do the step, but if you're like me and impatient to get on to detailing when you finish the base coat it speeds it up nicely.

The next step after the sealer cures is to start your first layer of pastel or pigment. I use two shades of black - Vine Black and Black for Fresco. Vine Black goes down less heavy so I use that near the top of the knee and the bottom of the forearm so it will blend easier. Black for Fresco is used on the fetlock, pastern, and canon where it is darker.

First layer of pigments
   
Fourth layer of pigments
 Final layer of pigments
Next I move on to the grey parts. First I put down a layer of of black pigment and seal it in. Then I put down a layer of white, the seal it in. Alternate until you get it solid and to the color you want. I use this technique for the eyes, muzzle, ears, and genitalia. If you get any black sealed in where you don't want it, just wait for the sealer to cure and sand off the black. Seal it and that should take care of any frosting that occurred because of the sanding.
First layer

Final layer
In order to get a soft black for the mane and tail, I mix together burnt umber, burnt sienna, and black acrylics. To shade in the crevices I use a mix of burnt umber and black.

Not the horse I've been using but I've used the mixture
on this horse
I will go over how I do eyes, hooves,and white markings in separate posts.