Friday, June 28, 2013

Sleeping Mermaid - an Original Sculpture

So I decided to do something a little different while waiting for the sealer to dry. This sculpture has been sitting around for months from my sculpting class without color.

without clothing

Base color of the rock is finished

everything painted and waited to be sealed

Everything is sealed and the mermaid and parts of the
rock are glossed to give a wet look

another angle
Just thought I'd share - the story I'm writing for Camp NaNoWriMo involves mermaids so I might do a series of my mer characters.

Thursday, June 27, 2013

How I do a Bay using Pigments and Pastels Part 1

I haven't done a tutorial in a while and figured since I have been doing a lot of bays lately I might as well show you how I do one.

Supplies -

  • Prepped Model
  • Various shades of pastels/pigments - You don't have to use the exact colors I listed - it all depends on what shade you're going for.
    • burnt sienna
    • light and dark yellow ocher
    • various shades of brown
    • black
    • titanium white
  • Cut down brushes/ Q-tips/ What ever you use to apply your pastels/pigments
  • Matte and Semi Gloss acrylic sealer such as Krylon 


Now I start out finding a reference picture. You can look in magazines, breed books, the internet - basically anything that has pictures of horses will work. I used Google to find this dude -

photo from the Jockey Club
Next step is to pick your model. You can switch this step and the first it's just that earlier this year I went on a prepping frenzy and now have several models waiting for clothing. The model I chose was the Breyer Classic Cutting Horse.


The next step is to sock or buff your horse. This is just rubbing your horse with a clean white sock to knock anything down that would cause grain. Grain is just little dots of darker color that pop up and take forever to work out, so you want to avoid it at all cost. It is cause by any tiny divots in the primer/sealer or by going to dark to fast. Rubbing with a sock is the same as sanding with a high grit sand paper, but your not risking sanding off primer.


Going off of your reference picture, it is time to choose your lightest color. I usually go with a mix of light yellow ocher and dark yellow ocher pigments. I use pigments because of their richer colors, the fact that it comes pre-ground, and they have no binders so it takes less layers than regular pastels that come in sticks. I get my pigments from here. After the yellow ocher is sealed in I laid down a light layer of natural sienna to get this color.


If I was making him more of a blood bay I would lay down a few layer of red before I move on to the next step - I would use burnt sienna, natural red ect. Since I'm making him more brownish toned I went straight in with Brown 610. This is a very strong color and can go very dark very fast so if you are you using this color be careful. In between some layers, I use semi-gloss spray because it seems to make the color more vibrant. This is a personal preference and if you don't wish to do it, you don't have to. 
First Layer
4-5 layer in and ready for the next step
The next step is to darken the top line according to your reference picture. If your reference horse is flat (little to no top line darkening) don't be afraid to exaggerate within reason to make it more pleasing to the eye. I used a shade of dark brown that was close to the color of dark chocolate to shade may top line.

The darkening is very subtle but it does add to the horse
visually
To do the shading in the muscle grooves I used a small angle brush. The pigment mixture I used was a dark brown, a tiny scoop of black (black pigment is very strong), and a very tiny scoop of a lighter brown.


In the next installment I will be going over how I do black points, shade the parts that will be grey, and finish it off with how I detail my bays.


Tuesday, June 25, 2013

The BreyerFest Custom Frenzy

So this year is my first year in the BreyerFest Open Show so I wanted to beef up my custom show string. I had originally planned on five new customs, but unfortunately due to several primer/sealer reactions, I have only been able to work on three. The models that had the reactions will get done - I just need more time than the BreyerFest deadline allows.

First up is Murphy's Law a Stablemate Thoroughbred painted to a dark bay. He is going to have one front left sock and a stripe.


Next up is The Mad Hatter Theorem. He is the Classic Cutting Horse who is also in the stages of dark bay.


And last is The Middle-Earth Paradigm. He is the Stablemate running thoroughbred, who will be painted a dappled grey. Right now he is only in primer.


 My horse list is almost done and next on my to-do list (besides finishing theses dudes) is my tags!

Monday, June 24, 2013

Camp NaNoWriMo


Camp NaNoWriMo is a writing challenge that takes place during July. You set a word goal for yourself (mine is 50,000 words) and the write a novel on a topic of your choice. You are also put in a "cabin" with seven other people who help inspire you ect.

It sounds intense but fun! If you enjoy writing you should definitely look into this!

Camp NaNoWriMo website

Sunday, June 23, 2013

NAN Brags and OF Performance Pics


So as most of you know NAN has been held for the past two days (today being it's last day) in Harrisburg, PA, at the Farm Show Complex. It was my first NAN ever and it has gotten me addicted! Next year I hope to qualify some customs to show. NAN was also one of the most organized show I have ever attended, the only show that I believe matches it is the BreyerFest Children and Youth show, so a big shout-out for the team who put it together!

On the first day I had six horses to show. Two of those six got a Top Ten!

Eagle's Wing (BreyerFest Special Run Sprinkles)

Guapo (BreyerFest Celebration Horse Alborozo)
Day two of NAN I had two horses in OF Performance. I saw some amazing Performance setups and customs. I wish I was able to take pictures of everything - but here are some pictures that I was able to get:


Grey Workmanship (I think)

My entries

I really like the drafter on the right!

It's so tiny!

I love the color combo

Awesome tack!

I love Native American costumes in general 

Look at those dapples!!

Sunday, June 2, 2013

DIY Greek Goddess Costume


Hello again! I know its now where near Halloween, but a friend of mine threw a birthday/end of the school year masquerade and I figured I would share how I did it! First my supplies list -

  • a blank mask
  • sculpy/apoxie/and type of clay
  • silver spray paint
  • green glitter 
  • glow in the dark glitter
  • long/short flowy dress in silver or green 
  • gladiator sandals or shoes of your choice
  • optional to customize your dress:
    • glittery add ons
    • ribbon
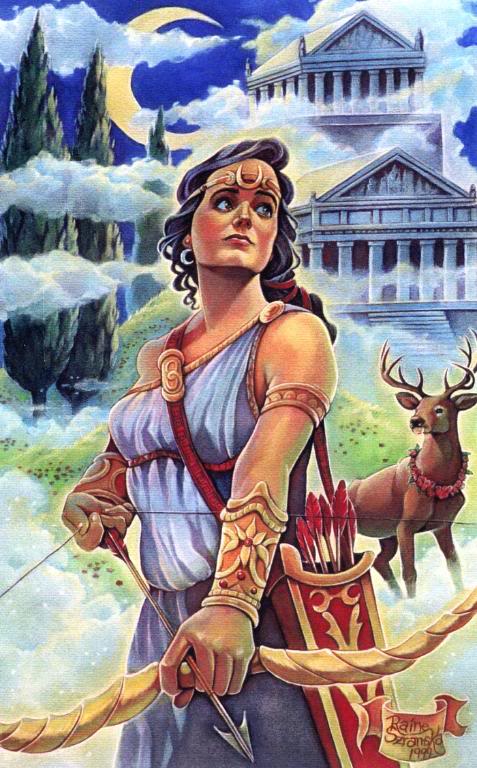
The Greek goddess I'm going as is Artemis, goddess of the hunt, animals, and moon (she is the goddess of many other things to but theses are the things I based my mask off of). The first thing I did was search for pictures to inspire me - these are a few I found:


Some of the elements that I wanted to put in my mask was the silver, green, moon, and stag. So I went off to Adobe Illustrator (you could use anything to do this step or skip it completely) to do some potential designs. My final design was this -


Next I got down to actually making the mask. Unfortunately I didn't take pictures of the steps I took, but first I sculpted a half moon out of sculpy, dried it, and super glued it to the mask. Next I spray painted it silver and drew on the outlines of the animals. Then I painted the outlines in metallic green and added glitter. Annd I'm done! Whoo! Here is the finished product -  


The next thing to do is find a dress - you don't need anything fancy, you can even get a dress from a thrift shop! I got a a dress from Ross that just needed a little tweaking to get it just right.


The dress is a dark greyish green. The one thing I didn't like was the waste band so I'm adding silver ribbon. It also has a little peak-a-boo hole right above my chest and I'm adding the glittery stone inside it.
Next is the hair - I drew inspiration from Daenerys Targaryen from the show Game of Thrones.

Shout out to my mom for adapting the look to my short hair!


The final look:

sorry for the lack of mask, all the pics I have with the mask on
are crappy.


Saturday, June 1, 2013

The Foal Chronicles Part One

Hello again! This series of posts will record my first experience with doing a foal color. 

The first thing I did was choose my body - this was easier than I thought as I only had one foal body in my body box.


Next I chose a color - I chose light bay - now the next step is to find a ref pic. A quick Google search brought up this pic -

pic from popui from deviantArt
The next step is the dreaded prepping - this foal has his first coat of primer - there is still a lot of sanding to go but he is well on his way to getting color.


First coat of primer