Saturday, July 13, 2013

My Journey into Resculpting - Sculpting the Mane

So today I did the mane. Just like the tail I used the snake method to map out the direction and length of the mane.


Next I began sculpting in the hairs, first I would do some deep grooves, splitting the snakes in two or sometimes three. Next I would do some lighter grooves to add more texture.
My sculpting tool is the end of a paint brush
        

Every so often, I'll brush some rubbing alcohol up the mane to get rid of little balls of clay that will inevitably show up.

It is finished!
The way I do the forelock is the same way I do the manes only with thinner and shorter snakes.


Friday, July 12, 2013

My Journey into Resculpting - Finishing the Tail

So when I last left you I was letting the tail firm up before sculpting the other sides. But even as it was drying, I started disliking it more and more. The tail bone was too thick for my taste, and I didn't like how the tail was flagged. So I decided to redo the tail with a different set.


I let that sit over night to fully cure and started sculpting the hair of the tail.

Almost done with the front side

Done!
Then I noticed that one of the hooves was raised off the ground. I did a couple tests, setting the horse on the table tail and all, that had the hoof raised, and then set it on the table with the tail hanging off the table. That test revealed the problem - the tail was to long! So I took my trusty Dremel and cut about an inch and a half of the tail off. I fixed some of the hairs that had been distorted and finally the tail was done! Phew!


Next, I'm moving on to the mane, and fixing the feathers that were damaged when I cut off part of the tail.

Thursday, July 11, 2013

More about my Journey into Resculpting - Ears and Tail

So after the apoxie firmed up, I attached the ears (sculpted by Kristian) to the horse. Unfortunately the horse fell over a couple times, so there was a lot of reattaching of the ears.

Finally attached!
Next I drilled a hole for the wire for the tail bone. After I super glued it in, I built a base out of apoxie and let it dry overnight.


Looking it over I realized I had to thin out the tail bone and add more fat to the chest.


I sanded the tail bone down a little more and started sculpting the hair of the tail.

One side down 3 to go!
In the next post, I'll show you the finished tail and move on to how I do the mane.


Wednesday, July 10, 2013

My Journey into Resculpting


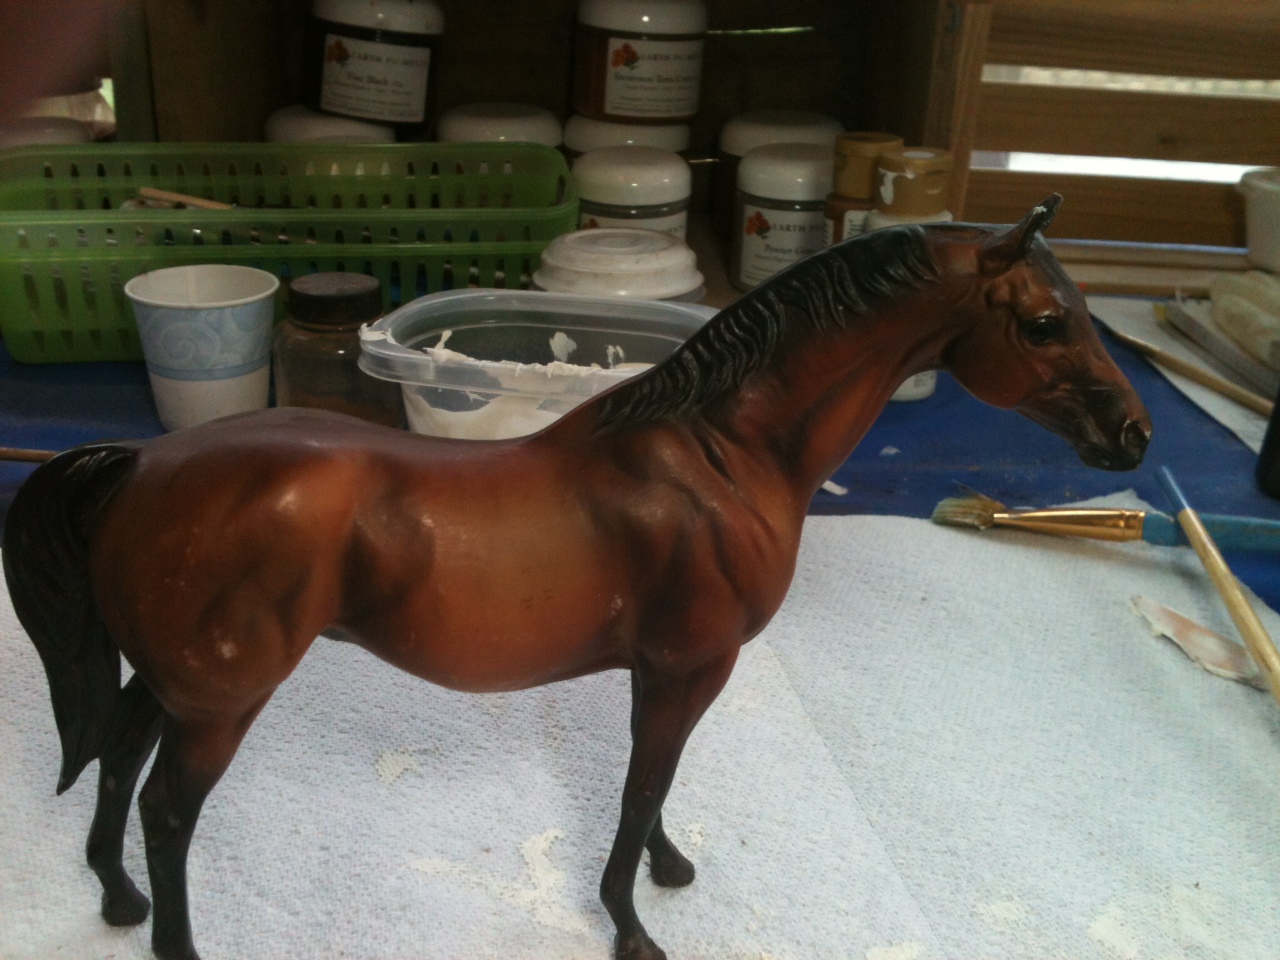
 So today I decided to start a resculpt of Seabiscuit to a Welsh pony. I have very little experience in resculpting so do enjoy the bumpy ride it's bound to be!

The victim
The reference 

I started off by cutting off the ears, tail, and mane. Then I started to fatten him up!


Well now I have to wait for the apoxie to firm up, I use Magic Sculpt, next is attaching the ears, and sculpting  the mane and tail. Oh and Kristian Beverly of Five Paws Studio is now my sculpting guru :-)


Sunday, July 7, 2013

Grain, Grain, Go Away...

So if you have ever done a horse in pastels or pigments, unless you have been extremely lucky, you have had grain on your horse. Grain is usually caused by very small divots in your horse's primer or sealer. It can also be caused by going using a color a couple shades darker than the color you have already laid down or not allowing enough time for your sealer or primer to dry.

Grain from going to a shade of light yellow to a medium brown
One of the things you can do to counteract grain is to buff the horse with a clean (I can not emphasize how important the clean part is) white sock, this is often called socking. Once your primer is completely dry, I usually give it a day or if I'm impatient at least twelve hours, you rub your horse with the sock until it has a shine. This process is essentially the same as sanding with a high grit sand paper, without running the risk of sanding off primer. The sheen comes from knocking down the divots that create grain. 

The shine of a socked horse
Even with the sheen pastels or pigments should still stick to the horse. If they aren't, hit the horse with a coat of Krylon Matte Sealer (or something similar). Wait for the sealer to cure and buff, after buffing try applying the pastels or pigments again.

Another cause for grain is missing a part of your horse with the sealer. If you don't notice this and you lay down another layer of color, the parts that aren't sealed in will not get any darker. So my cure for that is looking your horse over after you seal it. If you see a lighter color then what you had just sealed in, hit that part of the horse with another layer of sealer.

My advice for you is if you are doing a lighter color, buff, buff, buff, and buff again! You should buff every time your layer of sealer cures. When you're doing a darker color you have a bit more leeway, but I still recommend buffing in between every layer.

If you have any questions, please ask! Also if you want to see any type of tutorials, just ask, I'm very easily swayed :-).

Wednesday, July 3, 2013

Studio Fun Day

So today was a fun day with my Friend Kristian Beverly of Five Paws Studio. We worked on customs all day! Woot!

Say hi!
I got a lot done today! I finished my last custom for BreyerFest "The Mad Hatter Theorem" a bay quarter horse on the cutting horse mold.


He is done in pigments and detailed in acrylics. He has a star and snip, and a sock with ermine spots. I consider him to be at least PSQ. I also have started two new stablemate customs who will be making appearances in a later post.


Monday, July 1, 2013

How I do a Bay in Pastels and Pigments Part 2


So in Part 1 I showed you how I do the base color and shading of a bay horse. In this segment I'll show you how I do the black points, grey points, and details.

Supplies Needed
  • black paint (craft or artist quality)
  • burnt sienna
  • burnt umber
  • black pigment or pastels
  • titanium white pigments or pastels


First comes the black points on the legs. This first step is optional. First you take black paint (I prefer artist quality because I can get better results. You can use a craft brand too - whichever you prefer.) Thin the paint down to a milky consistency. 


Next paint the pastern and fetlock the darkest thinning the paint until you can barely see it below the knee.


Let the paint dry thoroughly and seal it in. This step helps achieve the look of the darker fetlock and pastern. It also makes the black look more blended. You don't have to do the step, but if you're like me and impatient to get on to detailing when you finish the base coat it speeds it up nicely.

The next step after the sealer cures is to start your first layer of pastel or pigment. I use two shades of black - Vine Black and Black for Fresco. Vine Black goes down less heavy so I use that near the top of the knee and the bottom of the forearm so it will blend easier. Black for Fresco is used on the fetlock, pastern, and canon where it is darker.

First layer of pigments
   
Fourth layer of pigments
 Final layer of pigments
Next I move on to the grey parts. First I put down a layer of of black pigment and seal it in. Then I put down a layer of white, the seal it in. Alternate until you get it solid and to the color you want. I use this technique for the eyes, muzzle, ears, and genitalia. If you get any black sealed in where you don't want it, just wait for the sealer to cure and sand off the black. Seal it and that should take care of any frosting that occurred because of the sanding.
First layer

Final layer
In order to get a soft black for the mane and tail, I mix together burnt umber, burnt sienna, and black acrylics. To shade in the crevices I use a mix of burnt umber and black.

Not the horse I've been using but I've used the mixture
on this horse
I will go over how I do eyes, hooves,and white markings in separate posts.